If you have ever had an idea about selling online, but did not want to deal with delivery, packaging, or coping with stock, you can do it with digital products. They might be the perfect solution for you. One of the simplest platforms to begin with is Etsy.
In this blog, we will walk you through how to begin selling products on Etsy, mainly digital products like printables, templates, planners, and more. Whether you are a designer, author, or just a person with creative ideas, you will examine everything you need to recognise to get started.
What Are Digital Products?
Digital products are documents that clients can download and use right away. No shipping is needed. Some popular examples include:
- Printable planners and calendars
- Wedding invitation templates
- Wall art prints
- Resume templates
- Budget trackers
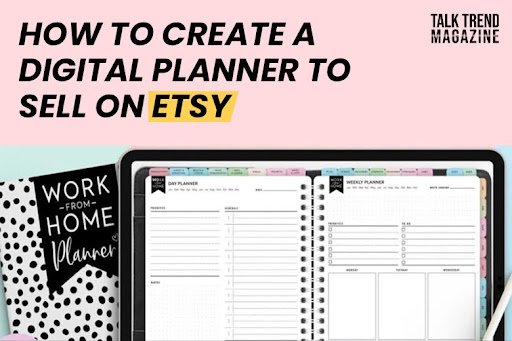
- Digital planners
- Educational worksheets
Once you create and add them, they can be sold again with no more work!
Why Sell Digital Products on Etsy?
Etsy is well-known for hand-crafted and innovative items, but it is additionally one of the best platforms for selling digital products. One huge purpose is how novice-friendly it is. The setup system is simple and does not require any technical abilities. Etsy also has a large audience, with millions of people visiting the site every month, looking for precise and beneficial items.
Plus, the startup expenses are low. You do not need to spend money on materials, packaging, or delivery because digital products are downloaded instantly. Another massive benefit is the chance to earn passive earnings. Once you create and add a product, it can be sold over and over without any further changes. If you are asking yourself, “Is it worth selling merchandise on Etsy?” The answer is truly yes.
Many sellers are making steady profits, with some incomes of hundreds or even thousands of dollars online each month, simply from their digital downloads.
Step-by-Step: How to Sell Digital Products on Etsy
Let us smash down the steps that will help you get started.
1. Choose Your Niche
First, think about what kind of virtual products you need to sell. Choose something you are a top at or are interested in. Niches that do well include:
- Personal organization (planners, to-do lists)
- Small commercial enterprise tools (bill templates, social media kits)
- Education (printables for kids, instructor resources)
- Art and design (posters, coloring pages, virtual wallpapers)
Tip: Do a few studies on Etsy to see what is already promoting, then think about how you may do it in another way or more elevated.
2. Create Your Product
Use layout gear like:
- Canva (top notch for beginners)
- Adobe Illustrator or Photoshop (for advanced layout)
- Procreate (for hand-drawn artwork)
Make sure your documents are extremely nice and easy to apply. Save them in popular formats like PDF, PNG, or JPG.
3. Set Up Your Etsy Shop
Go to Etsy.com and click “Sell on Etsy”. Follow the prompts to:
- Name your shop
- Add a profile photo and shop banner
- Write a brief bio and shop description
Choose a name that fits your brand and sounds innovative yet clear.
4. List Your Digital Product
When you are all set to list your product on Etsy, start by deciding on “Digital” because the product type lets shoppers realize it is a downloadable item. Then, add your files. Etsy allows as many as 5 files per listing, or you may integrate the entirety right into a single ZIP folder for easy access. Create a clean and catchy title that includes applicable key phrases to help your product get noticed.
In the description, explain exactly what the buyer will receive and how they could use it. Make sure to add tags associated with your product, along with “printable planner” or “digital budget template,” to improve visibility in search results. Finally, set an honest charge by checking what similar objects are selling for, so your listing stays competitive.
5. Promote Your Product
Although Etsy already brings in a whole lot of traffic, promoting your listings on your account can make a considerable difference. Sharing your products on social media structures like Instagram, Pinterest, and TikTok enables you to reach more potential shoppers who are probably interested in your niche.
You can also start a blog or website in which you provide helpful recommendations related to your product, which builds credibility and drives visitors to return to your Etsy shop. Offering a free digital item in exchange for an email address is another smart way to grow your target audience.
Additionally, the usage of Etsy advertisements can boost your product’s visibility on the platform. Simply put, the more people who see your product, the better your chances are of making extra income.
6. Deliver and Support
Since digital items are automatically delivered after purchase, Etsy takes care of sending the files to the client. However, it is nonetheless important to provide clear commands, especially in case your product requires modification or printing.
Make sure your customers understand how to use the documents they have downloaded. Also, respond to any messages promptly and politely. A good verbal exchange suggests professionalism and care. If any troubles arise, be ready to update or fix the product as required.
Offering splendid customer support not only builds consideration but additionally increases the probabilities of getting repeat shoppers and positive critiques.
Is It Worth Selling Products on Etsy?
For many people, selling products on Etsy is completely worth it. It is ideal for side profits, in particular if you enjoy creating and want to earn a living from home.
Here are a few pros and cons to remember:
Pros:
- Low risk and low cost
- No stock or transport complications
- You can earn passive profits
- Easy to test new thoughts
Cons:
- Etsy takes costs (listing and transaction)
- You will need to stand out in a competitive market
- You are responsible for marketing your shop
If you are innovative and inclined to study, Etsy is a great place to construct a digital product business with very little upfront funding.
Final Tips for Success
Keep gaining knowledge of what works by checking the aid of checking top dealers in your niche.
- Use SEO-friendly titles and tags so more people can find your listings
- Bundle your products to offer more value (like a 3-in-1 planner set)
- Ask happy clients to share their opinions
- Be patient, success does not manifest overnight, but constant attempt pays off
Wrapping It Up
Selling digital merchandise on Etsy is one of the simplest ways to start selling online. You do not need to be a tech professional or an artist, you simply need an idea, a piece of creativity, and the willingness to learn.
So if you have been thinking about selling products on Etsy, now is the time to give it a try. With low cost, high capability, and lots of tools available, your digital shop will be only a few clicks away from success.