Illness can catch us unaware, more so with advancing age. The Global Burden of Disease 2023 report found that conditions like ischemic heart disease and COPD continue to be the leading causes of illness and mortality across the world. It also reported a growing incidence of diabetes and mental health disorders.
Among older adults, long-term illness can be stressful for the family, who struggle with providing adequate care. Well-intentioned as they may be, continued care can be difficult to balance with other life priorities, such as work or college.
Moreover, some situations can leave family members feeling helpless, unable to cope with the caregiving burden. This can occur when illness takes a turn for the worse, leading to increased loss of mobility and altered dietary routines. Failing to take the necessary steps can worsen the health outcomes for patients.
Let us identify the signs that strongly indicate the need to go beyond family care for your loved one.
Increasing Caregiver Burnout
First, it may seem selfish to consider your own needs before those of the one suffering. However, caregiver burnout is crucial to identify and manage to protect the health of everyone involved. Cleveland Clinic highlights that when a patient’s needs exceed the caregiver’s capabilities, it can become a risk factor for elder abuse.
Across the US, particularly in states with a significant older population, the need for care is rapidly rising. For instance, the U.S. Census Bureau reports that the population of older residents in Philadelphia increased by 22.3% in the last decade.
Unfortunately, many seniors don’t receive adequate help due to their family’s lack of time or ability. The stress of supporting an ill family member day after day can manifest as frustration or neglect. Financial reasons or the stigma associated with care homes may prevent families from exploring a residential facility.
Take immediate action if you detect these behavior patterns in yourself or another family member who’s the designated caregiver:
- Excessive or unmanageable stress.
- Frustration leading to neglecting caregiving duties.
- Incidents of poor behavior toward the patient, likely triggered by stress.
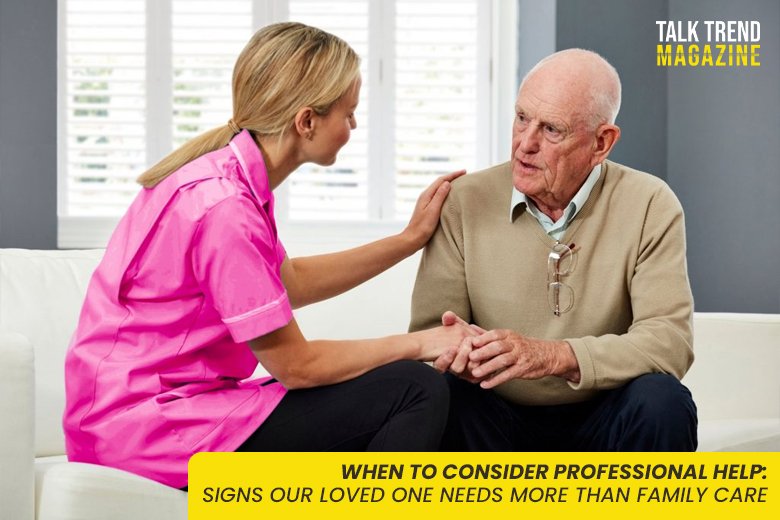
Instead, you can consider a professional at-home caregiver, which has emerged as a viable option for many senior adults in America.
These professionals are trained to help people manage everyday life with dignity and comfort. According to caringfamilyhealth.com, this option also offers the benefit of a personalized care plan, which can be particularly beneficial for older adults struggling with mobility issues or chronic illnesses.
Major Changes in Mobility, Nutrition, or Hygiene
Several conditions related to old age are associated with mobility restrictions. Osteoarthritis can reduce movement by causing muscle stiffness, making daily life challenging during flare-ups. Stroke also becomes more common in senior adults, sometimes causing paralysis and speech problems.
Mobility changes can affect everything else in life. The ability to cook and eat meals on time. The strength to take baths and attend to personal hygiene.
If the health condition does not improve, the patient may require prolonged assistance with feeding and using the bathroom. They will also need support to attend appointments or participate in activities that can improve their quality of life, such as rejuvenating sunshine in the square.
The Conversation notes that many modern cities are not elder-friendly, with roads difficult to cross and a high risk of falls.
Seek professional support if you:
- Struggle to find time for everyday support with meals and toilet trips.
- Cannot take the patient to necessary appointments or wellness-related activities.
- Don’t feel confident handling delicate tasks such as helping the person to the washroom, which can be a fall hazard if not done appropriately.
High-Risk Indicators of Poor Mental Health
Mental health can take a major hit among people suffering from prolonged illness. In seniors, this can become apparent as memory problems or cognitive issues in decision-making and other chores.
Dementia is particularly notorious for its stark, distressing symptoms. Alzheimer’s, the most commonly seen form, can cause memory loss and confusion. The WHO reports that dementia is one of the major contributors to disability and dependency in older people.
Your loved one may also be struggling with mood disorders, such as depression, and withdrawing into a bubble. Social isolation among older people is a veritable challenge. It can become worse in the absence of companionship, which may happen when you’re off to work or out of the house during the day.
Caring for seniors with mental health conditions can be overwhelming. An Innovations in Alzheimer’s Disease report predicts that over 13.8 million Americans may have Alzheimer’s by 2060. Managing their medications and providing palliative care will be daunting with more care facilities closing down.
Consider seeking professional care if you notice:
- Worsening mental health in the patient with signs like agitation or confusion.
- Social withdrawal and refusal to communicate.
- Forgetting medication or appointments even after you’ve provided instructions.
The decision to access professional care for a loved one will never be uncomplicated. It can make you feel that you failed to manage what you must have by yourself. It can be financially worrying, particularly when combined with the cost of medication and ongoing doctor’s appointments. But some decisions must be made, for the betterment of everyone involved.
Family support and companionship will always matter. It can directly impact your loved one’s confidence in healing and bring meaning to their days. However, sometimes, family care will simply not be adequate.
Don’t let your emotions get in the way of adopting the optimal care plan for your family.